post

How To: End-to-End SnapProtect Storage Policy Creation

The example I’m going to give here is for an environment that is already configured but has storage controllers that are not configured as NAS iData Agents for backup or any volumes on those controllers. In this environment the controller I’m enabling backups on is the secondary storage tier which is already a snapvault destination so it is in the Array Manager for SnapProtect. This environment requires new NetApp aggregates to be added as resource pools as new volumes and data have been assigned to the aggregates. The process involves working with SnapProtect, NetApp Management Console (DFM) and the NetApp storage controllers.

Enable backups on a controller within SnapProtect:

Enable Accounts

Before you begin log onto the controller and ensure the login account you require has access to the controller. To do this open a SSH session to the controller and use the following command:

#useradmin user list

If the account used by SnapProtect doesn’t exist then you’ll need to add it as an administrator. Below is a snapshot from a controller where it is added and also a controller where it’s not.

SnapProtect End to End Step 1

SnapProtect End to End Step 2

You can add the account via the command line or via the web console. In this instance I added the account via the console. In System Manager go to Configuration -> Local Users and Groups -> Users and click Create. Enter the required details and click Create.

SnapProtect End to End Step 3

Once completed you can re-run the command from the CLI to ensure that the account appears Read More

post

How To: Remove a volume from NAS backup in Simpana 10

I have an issue recently where I had to remove a volume from within a NAS client subclient so that I could move it to another location within our environment. Due to the limitations within Simpana10/SnapProtect v10 it’s not possible to select the volume and delete the related snapshots to clean up the subclient. The backup jobs need to be deleted to remove the snapshots. As there are multiple volumes within the same subclient deleting the jobs would delete the snapshots for all volumes, not just the one I need to clean up. Given this, there is only one option and that’s to break the relationships in DFM and clean up the volume manually.

Step 1: Go the the OnCommand server and run dfpm dataset list

C:Usersderek>dfpm dataset list

Id         Name                        Protection Policy           Provisioning Policy Application Policy          Storage Service


2927 CC-SnapProtect-XX_SC-45 SnapProtect Back up, then mirror                                                 CC-SnapProtect-XX_Copy-66

3072 CC-SnapProtect-XX_SC-46 SnapProtect Back up, then mirror                                                 CC-SnapProtect-XX_Copy-66

2935 CC-SnapProtect-XX_SC-39 SnapProtect Back up, then mirror                                                 CC-SnapProtect-XX_Copy-70

7011 CC-SnapProtect-XX_SC-42 SnapProtect Back up, then mirror                                                 CC-SnapProtect-XX_Copy-70

41601 CC-SnapProtect-XX_SC-72 SnapProtect Back up, then mirror                                                 CC-SnapProtect-XX_Copy-70

2811 CC-SnapProtect-XX_SC-7  SnapProtect Back up, then mirror                                                 CC-SnapProtect-XX_Copy-74

20149 CC-SnapProtect-XX_SC-68 SnapProtect Back up, then mirror                                                 CC-SnapProtect-XX_Copy-102

25497 CC-SnapProtect-XX_SC-83 SnapProtect Back up, then mirror                                                 CC-SnapProtect-XX_Copy-110

26575 CC-SnapProtect-XX_SC-102 SnapProtect Back up, then mirror                                                 CC-SnapProtect-XX_Copy-124

26094 CC-SnapProtect-XX_SC-98 SnapProtect Back up, then mirror                                                 CC-SnapProtect-XX_Copy-124

31037 CC-SnapProtect-XX_SC-122 SnapProtect Back up, then mirror                                                 CC-SnapProtect-XX_Copy-128

31650 CC-SnapProtect-XX_SC-41 SnapProtect Back up, then mirror                                                 CC-SnapProtect-XX_Copy-130

31654 CC-SnapProtect-XX_SC-72 SnapProtect Back up, then mirror                                                 CC-SnapProtect-XX_Copy-130

42833 CC-SnapProtect-XX_SC-59 SnapProtect Mirror, then back up                                                 CC-SnapProtect-XX_Copy-136

45647 CC-SnapProtect-XX_SC-128 SnapProtect Back up, then mirror                                                 CC-SnapProtect-XX_Copy-145

46010 CC-SnapProtect-XX_SC-127 SnapProtect Back up, then mirror                                                 CC-SnapProtect-XX_Copy-147

46084 CC-SnapProtect-XX_SC-43 SnapProtect Back up, then mirror                                                 CC-SnapProtect-XX_Copy-151

59566 CC-SnapProtect-XX_SC-4  SnapProtect Back up                                                         CC-SnapProtect-XX_Copy-159


Step 2: Pick the dataset you want to manage and display the relationships in DFM suing the dataset list -m command

C:Usersderek>dfpm dataset list -m  42833

Id         Node Name            Dataset Id Dataset Name         Member Type                                        Name

43325 Primary data              42833 CC-SnapProtect-XX_SC-59 qtree                                              primary_controller:/users/-

2244 Primary data              42833 CC-SnapProtect-XX_SC-59 qtree                                             primary_controller:/backup/-

3165 Primary data              42833 CC-SnapProtect-XX_SC-59 qtree                                             primary_controller:/ctx/-

42965 Mirror                    42833 CC-SnapProtect-XX_SC-59 volume                                             local_aux_controller:/SP_ctx

51886 Mirror                    42833 CC-SnapProtect-XX_SC-59 volume                                             local_aux_controller:/SP_users

42968 Mirror                    42833 CC-SnapProtect-XX_SC-59 volume                                             local_aux_controller:/SP_backup

52126 Backup                    42833 CC-SnapProtect-XX_SC-59 volume                                             remote_aux_controller:/SP_users

43084 Backup                    42833 CC-SnapProtect-XX_SC-59 volume                                             remote_aux_controller:/SP_ctx

43087 Backup                    42833 CC-SnapProtect-XX_SC-59 volume                                             remote_aux_controller:/SP_backup


Step 3: DFM Backup and CommServe DB Backup

dfm backup create backup_file_name

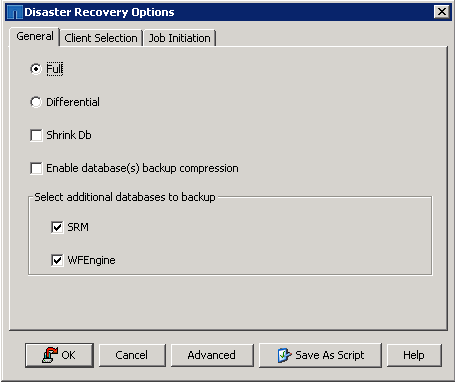
Run a DR backup in SnapProtect/Commvault

You can also capture a snapshot in vCenter also just to be sure


Step 4: Run dfpm dataset relinquish <id of secondary resource you want to remove> to break the relationships in DFM.

dfpm dataset relinquish 43087

dfpm dataset relinquish 42968


Step 5: Then, edit the dataset and remove the secondary resource if it is still part of the dataset via the Management Console


Step 6: In SnapProtect remove the volume from the subclient so that it’s no longer backed up.

And that’s that. You can now use the volume in other storage policies without it impacting another configuration

post

NetApp DFM Snapshot Management – Remove Orphaned snapshots

Orphaned Snapshot Removal – Identify Orphans

I’ve been banging my head against the screen for the past few weeks looking at storage issues and finding orphaned volumes with reams of snapshots using up valuable disk space. In some cases it was due to manual intervention and a snapmirror or snapvault relationship was broken, in others it was caused by DFM creating new instances of the volume but not cleaning up old volumes and associated snapshots and in other cases, well I’ve no idea how they occurred. Hence why I’ve been slapping my brain around the inside of my skull. I’d be interested to know if this is still an issue with OCUM, answers on a postcard.

There’s no pretty way to clean up orphaned snapshots that are essentially owned by DFM. It’s messy, convoluted and requires that you’re very careful and precise about what you’re removing otherwise you’ll make things worse. There are a number of reasons why orphans can occur. One is down to  the way SnapProtect and the DFM work together. If a VM is deleted or moved to another volume and no other VM’s that are a part of that same backup subclient exist on that volume the snapshots will not age and will require a manual clean-up process. This seems to limit the use of automated DRS in VMware, but that’s a separate issue really. Another reason, and what looks to be the cause in my case, is that DFM has intermittent issues communication to the storage controller and thinks the volume doesn’t exist so it DFM may create a FlexClone of the volume and index it to have a new suffix while still being able to access the snapshots that were already captured. This can be caused by network drop outs out by the controllers or the CPUs maxing out and not being able to reply to DFM. I’m still investigating the cause of this. If a new storage policy was created in SnapProtect with these volumes assigned it would clear out the orphans but that would involve re-baselining the backups which is not something you’d want to do, unless of course that data had to value to you.

Read More

post

How-To: NetApp SnapProtect – Service Pack Upgrade

Oh SnapProtect, how you taunt me! It’s one of those products that’s been OEM’d from another vendor so it’s missing some functionality and also means that the documentation specific to it can be sparse. Commvault documentation most likely will be sufficient but ideally there would be documentation would exist on how to perform Service Pack upgrades specifically for SnapProtect. I have a few issues with SnapProtect but I’ll leave that rant for another time. When it came to recently upgrade SnapProtect I had the issue of not finding documentation that would clarify the process so I thought I’d capture it so I can at least return to it in the future if I need to. Below are a list of steps carried out to perform the upgrade. I understand that the media agent upgrade may be flawed, and in my case I couldn’t get it to work correctly, so if someone knows what I’ve done wrong please feel free to leave a comment. I’m not an expert in either SnapProtect or its cousin Commvault. For the vast majority of SnapProtect admins this document may be superfluous but hopefully someone finds it useful.

Pre-Upgrade Task

1. Open a preemptive support case with Netapp

2. Download the software from NetApp support site, copy the installation file to the local drive on the server. The software can be access here with a NetApp login – mysupport.netapp.com/NOW/cgi-bin/license.cgi/download/software/snapprotect/10.0SP11/download.shtml

3. Open the SnapProtect Administrative console on the CommServe/SnapProtect Server. In the console right-click on the commserve, select All Tasks and take a backup of SnapProtect using Disaster Recovery backup.

snapProtect-upgrade step 1

Select the option as a Full backup and click Ok

snapProtect-upgrade step 2

4. Find the SET_XXX folder, in this case in the SnapProtectDR folder and zip it.

snapProtect-upgrade step 3 Read More