
Following on from a previous bit of work I carried out to convert vCenter from a physical to virtual machine I then had to upgrade vCenter from 5.0 to 5.5 Update 2 to allow the drivers for Trend Micro Deep Security Manager to work on the ESXi hosts. A workaround was tried to just have the ESXi 5.5 filter drivers for Trend installed on the 5.0 hosts but it caused some PSODs on our Dev servers and VMware recommended performing an upgrade of the environment. It was on my to-do list for later in the year anyway so it was good to get the upgrade out of the way. I documented the steps for the upgrade and while once again I didn’t want to create a multi-part blog post the sheer number of steps dictated that it was a requirement. I’ve broken down the posts into a 6-part series covering the below areas:
- Part 1 – Planning & Backups and Prep
- Part 2 – Unlink vCenter & Upgrade/Install Single Sign-on & Upgrade vSphere Web client
- Part 3 – Upgrade vCenter Inventory Service & Upgrade vCenter Server & Upgrade vCenter Update Manager
- Part 4 – Upgrade SRM & Upgrade SRA, Re-link vCenter & Site Secondary Upgrade
- Part 5 – Post upgrade tasks
- Part 6 – Upgrade ESXi hosts & Upgrade VMware Tools
Step 1 – Planning
1.1: Check Compatibility
The first thing you need to check is that all the components of your environment are compatible with the version of vSphere you want to upgrade to. The first step is this process is to gather the version details of all the installations and plug-ins that you have and use the VMware Compatibility Guide – http://www.vmware.com/resources/compatibility/search.php – to verify that all the components listed are compatible or at least find out what versions of your products are compatible and seek out information on the upgrade process for each of those components. For example in the below matrix we will be upgrading SRM from 5.0.1 to 5.5.1 to be up to the latest version supported on vCenter 5.5 Update 2. Likewise for the IBM plug-ins and the SRA required for SRM.
| Product | Current Version | Compatible Version |
| ESXi Host | 5.0.0 | 5.5 Update 2 |
| vCenter | 5.0.0 | 5.5 Update 2 |
| SRM | 5.0.1 | 5.5.1 |
| IBM SRA | 2.1.0 | 2.2.0 |
| Update Manager | 5.0.0 | 5.5 Update 2 |
| IBM TSM TDP | 1.1 | 7.1 |
| IBM Storage Mgmt Console | 2.6.0 | 3.2.2 (supported on 5.5) |
There is one other document to be aware of when it comes to planning for the upgrade and that is the upgrade sequence matrix so that you ensure that the correct products are updated at the correct times. This can be found here – http://kb.vmware.com/selfservice/microsites/search.do?language=en_US&cmd=displayKC&externalId=2057795
1.2: Download software vCenter 5.5.0 Update 2d
Go to the following website – https://my.vmware.com/group/vmware/details?productId=353&downloadGroup=VC55U2D
Select the relevant version of vCenter and click on Download Now
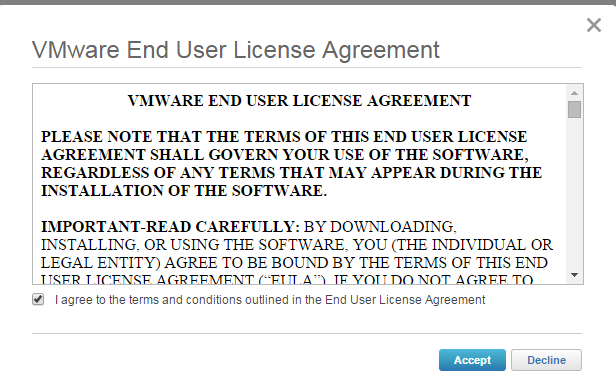
From here you’ll be prompted to log into the my.vwmare.com account. Log in. Accept the EULA
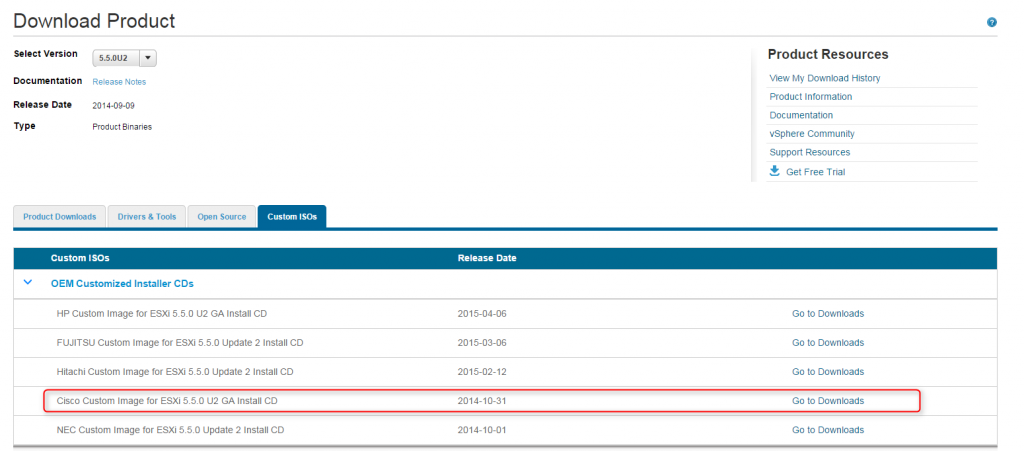
The download will begin. To get the Custom ISOs for Cisco blades for this version go to: https://my.vmware.com/group/vmware/details?downloadGroup=ESXI55U2&productId=353#custom_iso and click Go To Downloads

You will then be prompted to download an ISO or a zip bundle. Download whichever type you prefer to work with by clicking Download Now

1.3: Download SRM 5.5.1
Go to the following link:
https://my.vmware.com/web/vmware/info/slug/infrastructure_operations_management/vmware_vcenter_site_recovery_manager/5_5. Click On Go To Downloads

Select how you would like to download the file. I selected Download Now

Download will begin.

Next you can go to Drivers and Tools and expand Storage Replication Adapters

Click Go to Downloads. This will bring you to a list of SRAs. Scroll down to the adapter you require. And expand to verify that it is the correct version according to the compatibility matrix. Click on Download Now for the relevant SRA.

1.4: Download any remaining plugins which need to be updated
Download IBM TSM TDP – 7.1 plugin from here
http://www-01.ibm.com/support/docview.wss?uid=swg24035386

1.5: Download IBM Storage Mgmt Console 3.2.2 from here:

These plug-ins will require and IBM ID to download.
Step 2 – Capture backups of your data prior to migration
2.1: Log onto the SQL server (in this instance it’s the vCenter server) and open SQL Management Studio

2.2: Stop the vCenter services before capturing the backup

2.3: In SQL Management Studio select the database, right-click and select Tasks -> Back Up.

2.4: Next select Full backup and add a destination for the backup file.

2.5: Click Ok to begin backup. The backup will then complete successfully
 2.6: Once the backups are completed restart the vCenter services again.
Step 3 – Backup the SSL certificates
3.1: From the C drives: C:ProgramDataVMwareVMware VirtualCenterSSL. Copy these files:
- C:ProgramDataVMwareVMware VirtualCenterSSLrui.key
- C:ProgramDataVMwareVMware VirtualCenterSSLrui.pfx
- C:ProgramDataVMwareVMware VirtualCenterSSLrui.crt

Step 4 – Backup the ADAM instance DATA
4.1: Click Start, right-click Command Prompt, then click Run as administrator to open a command prompt.

4.2: Run the command:
dsdbutil
At the dsdbutil: prompt, run the command:
activate instance VMwareVCMSDS
Run this command to open the ifm prompt:
ifm
At the ifm: prompt, run this command for the type of installation media that you want to create:
create full F:ADAM_BackupVMwareVCMSDS

4.3: Verify that the file has exported

Step 5 – Take note of the ODBC connections, both 64-bit and 32-bit
5.1: Open Data Sources (ODBC). If it’s not in the start menu go to Administrative Tools -> Data Sources (ODBC).

5.2: Check System DSN and click Configure

5.3: Check that the database is connecting to the correct vCenter Server

5.4: Click Next. You can test the connection criteria by select Integrated Windows authentication or a local SQL account. Click Next

5.5: Verify the default database and click Next

5.6: Click Finish

5.7: Click on Test Data Source

5.8: Verify it connects successfully

5.9: Click Ok and click on again on the second dialog. Click Ok to close the ODBC connection.
5.10: To run the 32-bit ODBC connection checker go to C:WindowsSystem32 and run odbcad32.exe. This is a requirement specifically for VMware Update Manager as that connection does not use the 64-bit ODBC connector
Step 6 – Take a snapshot of the vCenter servers before continuing
6.1: Select the vCenter Server, right-click and select Snapshot -> Take Snapshot

6.2: I have chosen to snap the memory and quiesce the server. This is a bit of overkill but it will provide just a bit more consistency

As we have two vCenters in Linked Mode this will need to be done on both servers
6.3: Confirm the snapshot exists by going to the server, right-clicking and selecting Snapshot -> Snapshot Manager. You’ll see something similar to the following.

The next step in the process is to install SSO etc. in How to: VMware vCenter 5.0 to 5.5 Update 2 Upgrade – Part 2
Derek. Outstanding documentation! Much appreciated and will undoubtedly help my vCenter upgrades go smoother.